

Word documents – the most common format for electronic documents. Regardless of their importance and confidentiality, they may require a signature. To do this, you need to add a signature line in the document and send it to the second party, which should leave your details.
How to add a signature line with DigiSigner?
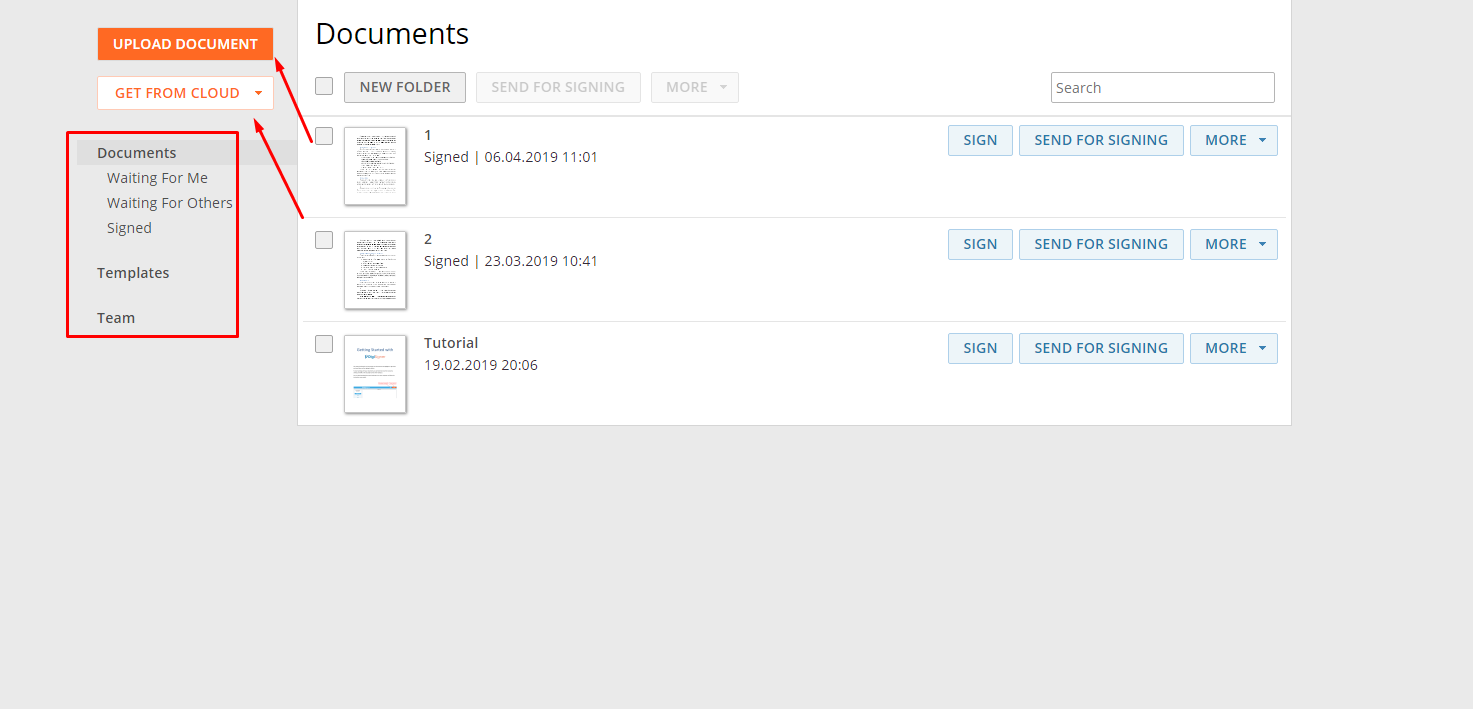
To add a line of the signature to the document, it is convenient to use the online service DigiSigner. To start working with the service, register by entering your email address. Immediately after this, your account will be available to you.
Add a document by clicking Upload to download from the device or Get from cloud to download from Dropbox cloud storage or Google Drive. When the document is displayed in your account, click Sign.
A new page will open. Flush to the place where the signature line is needed. Click the left mouse button and select a digital signature format: painting with a mouse or touchpad, loading a scan of a painting on a sheet, photo on a webcam or a text box.
After that, set the position and size of the signature in the document with the mouse. After completing the setup, click Done.
Signed appears in your account under this document. Your digital signature can no longer be deleted. To sign other members, click Send for signing. If the second party signs first, you will find the document in the Waiting for me folder.
You can create a template to add a signature line to all documents regularly. Fill in the fields, the information of which is constantly repeated, and save the workpiece. In the future, it can be added to the document with one click.
Digital Signature Lines in Word
The signature line looks like a regular, which is affixed to paper documentation. But the principle of its work is different. When such a line is added to a Word file, the author can provide information about the signer and instructions for him. When an electronic copy of the document is sent to the signer, the person sees the signature line and a notification stating that he must complete it.
In this case, the recipient has the opportunity to:
- enter a signature;
- select an image;
- sign handwritten input via a graphics tablet or touch input on a PC.
When the signer adds a visible representation of his or her signature to the document, a digital signature is added at the same time to authenticate the signer’s identity. A document with such details becomes read-only to prevent changes.
How to create a signature line in Word?
Choose a place where you need a signature line. On the Insert tab, click on the Text group and select Signature Line, and then click Signature Line for Microsoft Office.
In the window that appears, fill in all fields, enter the information that appears under the signature line: name, e-mail address, additional instructions or comments for the signer.
Then check the following checkboxes if necessary: permission to add comments from the signer and/or add the date of signing in the signature line. If more lines are required for captions, repeat these steps.
By signing the signature line, you create a so-called visible representation of your electronic signature. In the document, right-click on the signature line and select Sign. To add a printed version, enter the name in the box next to the letter X.
To select an image, click the corresponding button in the dialog box and select the file location, then click Add. For painting using a tablet PC, sign your name in the box next to the letter X using handwriting. Then click Sign. A button appears at the bottom of the document and the Signed icon.