This tutorial explains how to get started with our electronic signature API. You will generate your API key, learn how to send your documents for signing and find out what other features our API has to offer.

What Is API

API stands for Application Programming Interface and represents how an application interacts with a specific system. Our system offers an eSignature API to integrate electronic signature functionality into your application.

Our API is modern, built on REST principles, and uses JSON as the data format. In this tutorial, we will give you an overall impression of the possibilities of our electronic signature API. For the technical details, please look at our eSignature API Documentation.

Get Your API Key

To get started with our eSignature API, you should be able to authenticate yourself. To do it, you will need to obtain a personal API key. Every DigiSigner account holder is issued a personal API key and can start working with our electronic signature API immediately.

Click here to sign up for a free DigiSigner account Sign Up For a Free Account.

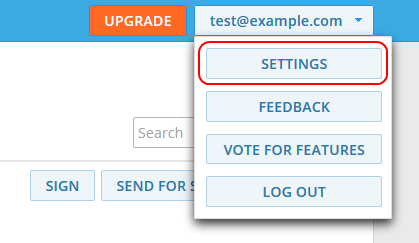
Your personal API key can be found in the settings section of your DigiSigner account.

1_how_to_find_settings

Get your API key

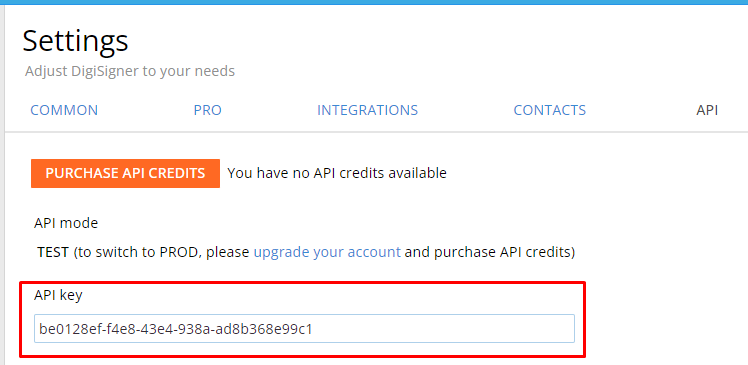
In the following examples, replace the text YOUR_API_KEY with your API key.

Please note that the initial API mode is the TEST mode. In this mode, a watermark is automatically added to all uploaded documents. We will switch you to PROD mode when you purchase one of our DigiSigner API Subscriptions.

How To Send API Requests

Our API is using HTTP as a communication layer. That means that every application implemented in the programming language capable of sending HTTP requests can be integrated with our system.

All our code samples contain examples of HTTP requests executed with CURL. CURL is a tool for sending HTTP requests from the command line and is the simplest option to demonstrate and test the possibilities of our electronic signature API. To send HTTP requests using CURL download it from CURL Download Page for your system and start sending API requests immediately.

We have also implemented two client libraries for our service: Java (see on GitHub) and PHP (see on GitHub). This will significantly simplify the integration with applications written in these languages.

Send Document for Signing via eSignature API

If you are using CURL, you need to make two API requests to send your first document for signing via API: upload your document to our service and send a signature request for this document. The upload request will return the document_id parameter of the uploaded document, which you will use as an input parameter in the signature request.

This doesn’t apply if you are using our PHP or Java client libraries. Then, you will only need to perform one API call, automatically uploading your document and sending the signature request for you.

Here is how to send your first signature request.

# upload document.pdf            
curl -u YOUR_API_KEY: -F file=@document.pdf https://api.digisigner.com/v1/documents

# got response: {"document_id":"5be88823-3ff5-4ec4-8175-459dee50f7fb"}

# send signature request            
curl -u YOUR_API_KEY: https://api.digisigner.com/v1/signature_requests \
-H 'Content-Type: application/json' \
-d '{"documents" : [ \
      {"document_id": "5be88823-3ff5-4ec4-8175-459dee50f7fb", \
       "signers": [{"email": "invited_signer@email.com"}] \
      }] \
    }'

The result of this request will be that the user with the email address invited_signer@email.com will receive an email with the button Open Document. After clicking on this button the user will be able to open, fill out and submit the completed document. You will receive the completed copy via email.

If you will login into your DigiSigner account (in which you generated your API key), you will find the uploaded document in your dashboard.

Please note that this is the most simple signature request possible. You can specify much more parameters, for example your own subject and message for the email that will be sent to the signer.

You can also send one and the same document to multiple signers, send multiple documents in one signature request or specify the fields, that should be filled in by the signer.

The ability to specify fields is especially important if you want to be sure that the signer or signers will sign your form and enter text only in the specified places. Not only will this make the signing process less error-prone, but it will also allow us to guide the signers from one field to the next and make sure that all required fields are filled in before the document can be submitted. So we definitely recommend you to use this option.

For the full list of available parameters please see Signature Request Parameters. For more code sample for sending signature requests please see How to Send Signature Requests.

We Support Different Workflows

We are aware that there are many different workflows when it comes to the integration of elecronic signatures in existing applications. That’s why we did our best to make our eSignature API as flexible as possible.

Here we describe two popular workflows that we support. If you have different requirements please don’t hesitate to contact us.

1. Embed documents on your website.

There are many use cases where you need to display documents to your website visitors. These documents should be displayed on your web page, and people should fill them out and submit without leaving your website.

This is one of the workflows that we support. For more information see the corresponding tutorial How to Embed Documents.

2. Send links to documents via email.

An alternative workflow is to send documents to people via email. That is useful when the people that should your documents are not right on your website. Then they have the possibility to review and sign your documents anytime and from anywhere.

For more information on this workflow see Send Document Links via Email.

Use Templates In Your Signature Requests

Do you need to send out for signing each time one and the same form? Then you don’t need to generate your PDFs dynamically in your code.

Instead upload your form as a template via DigiSigner dashboard and configure it by adding fields in the GUI mode. Then you can send out this template via our eSignature API.

By the way, you have here the option to dynamically pre-populate the template’s fields. So when the signers will open your form they won’t have to fill in the already pro-populated fields. You can also mark the fields as read-only to protect them from changes on the side of the signer.

See here for more information How to Use Templates Via API.

How To Use Text Tags

Text tags are pieces of text in a certain format that you can include in your documents to indicate the positions for signature fields, text fields, date fields etc.

For example if you include in your document the following piece of text [s:employee], it will be replaced on our side through a signature field, that’s going to be filled in by an employee who will open your document. There are tags for different kinds of fields.

Text tags are especially useful when you dynamically generate your documents and don’t know the exact positions of all fields in advance. Then you can just insert text tags in your document while you are generating it, and let us replace them through the corresponding fields.

See here for a step by step tutorial How to Use Text Tags.

Callback

After your signature request gets completed, your system should be somehow notified about it. This will give you the possibility to download the completed document.

You will be also able to retrieve all the data the signers entered while filling out your form, for example what they entered in your Name or Address fields (see How to Get Data Submitted By Signers).

To notify your system about the completion of your signature request we send you a callback request to the URL that you specified in your API configuration. If your system will be for some reason unavailable or unable to process our callback request, we will repeat it up to 6 times, with increasing time intervals.

Here you will find more information about Callback Request.


More tutorials and documentation

Signature Request Parameters – all signature request parameters
How to Embed Documents – how to embed documents on your web site to get them filled out and signed
How to Send Signature Requests – code samples for sending signature requests
How to Use Templates Via API – how to configure templates in GUI mode and use them via our eSignature API
How to Use Text Tags In Your Documents – how to specify fields in your documents using pieces of text
How to Get Data Submitted By Signers – how to retrieve data signers entered while filling out your form

Don’t hesitate to contact us in case you have any questions or suggestions about using our eSignature API.

Menu