Send Document for Signing
First, login to your account and upload a document by clicking on the ‘UPLOAD DOCUMENT’ button and choosing a file to upload. The document will appear in the list.
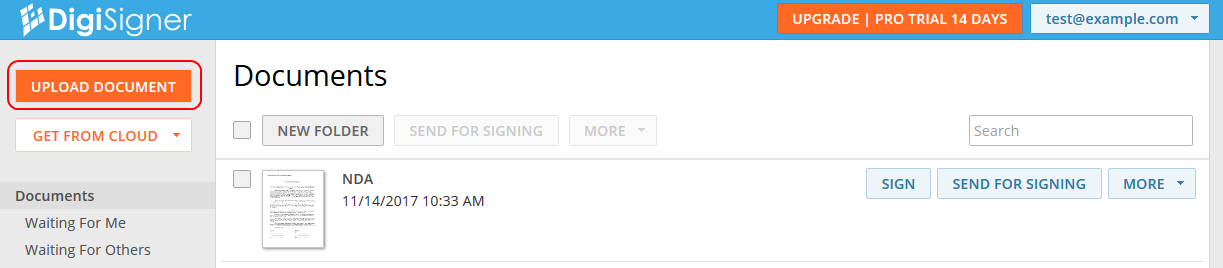
To send the document for signing, click on the ‘SEND FOR SIGNING’ button. The dialog for sending the document out will pop up. Enter the signer’s email address.
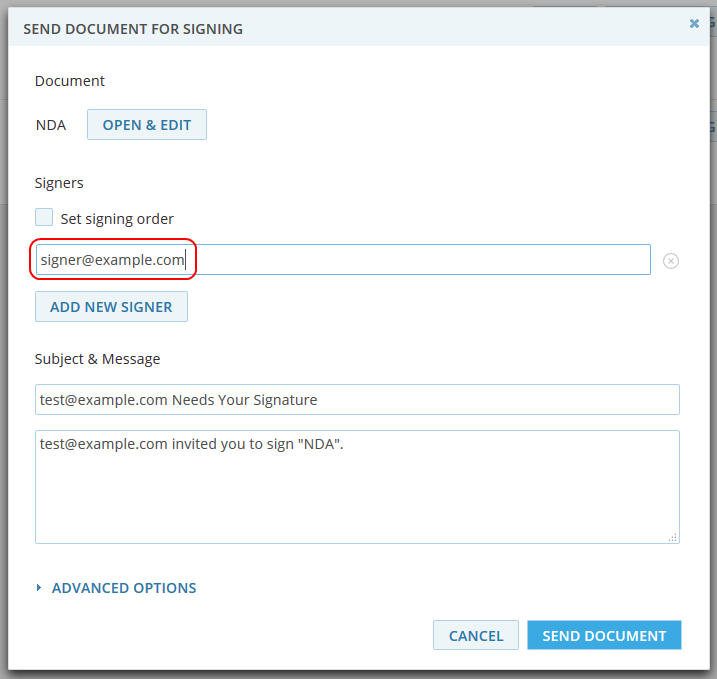
To add more signers, use the ‘ADD NEW SIGNER’ button. All of the signers will sign the same document copy.
In the dialog, you can also specify your own subject and email text.
Click on the ‘SEND DOCUMENT’ button. The email with the link to your document will be immediately sent to the signer. The signer’s email addresses will be also displayed next to the document image.
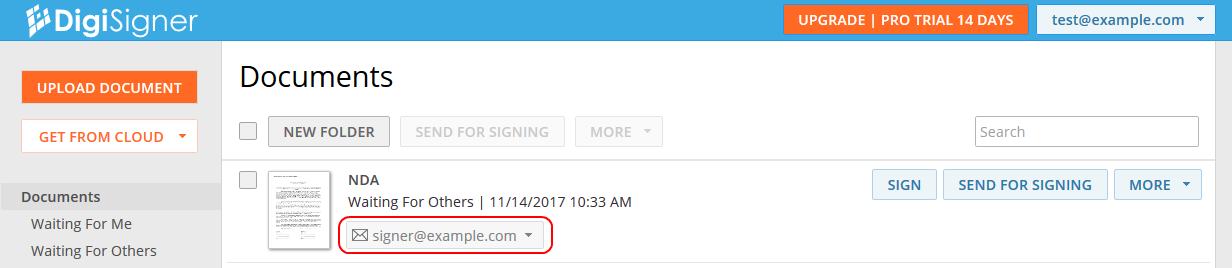
The closed envelope icon means that the document has been sent out for signing but hasn’t been opened yet. The status ‘Waiting For Others’ indicates that the document is yet to be completed by the signer or signers.
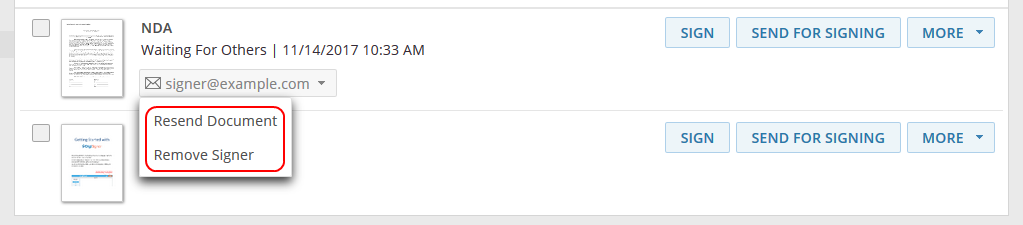
You can always resend the document or remove the signer by clicking on the signer’s email address and choosing the corresponding action.
Signer to Sign Your Document
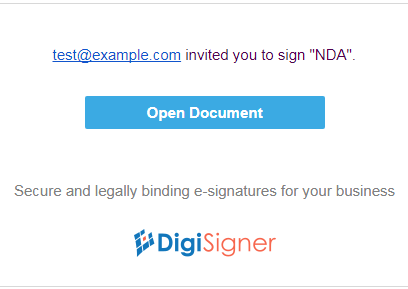
The signer will receive an email like the one in the screenshot. Please note the ‘Open Document’ button, which is automatically appended to the email.
After the signer clicks on the button, the document opens automatically in the browser.

The signer can now sign the document, add text to it etc. After filling out the document, the signer clicks on the ‘DONE’ button to save the document and complete the process.
After that you and the signer will receive a copy of the completed document in your inboxes.
In your account, you will also notice that the envelope icon was replaced through the green check mark meaning that the document was successfully completed. The status of the document changed to ‘Signed’.
We hope you enjoyed our tutorial. If something is unclear, or you have any suggestions, please don’t hesitate to contact us.