Add Fields to Document
After signing up or logging in, you will find yourself in the list of documents. Now, you need to upload the document that you want to get signed. Click on the ‘UPLOAD DOCUMENT’ button and select your document. You can upload PDF, Word, Excel, text or image files. After uploading your document, it will automatically appear in the list.
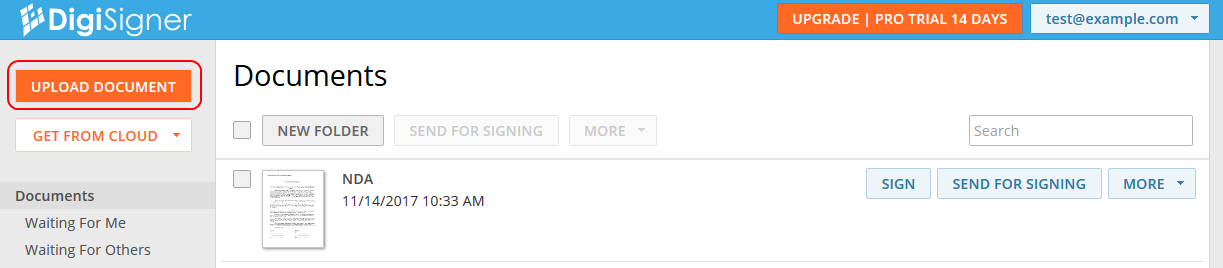
Then click on the document image to open the document. The document will appear on the screen.
If you want to sign or fill out your document yourself before sending it out for signing, you have the opportunity to do so now. For more information about how to do it, see our other tutorial How to Create Electronic Signature.
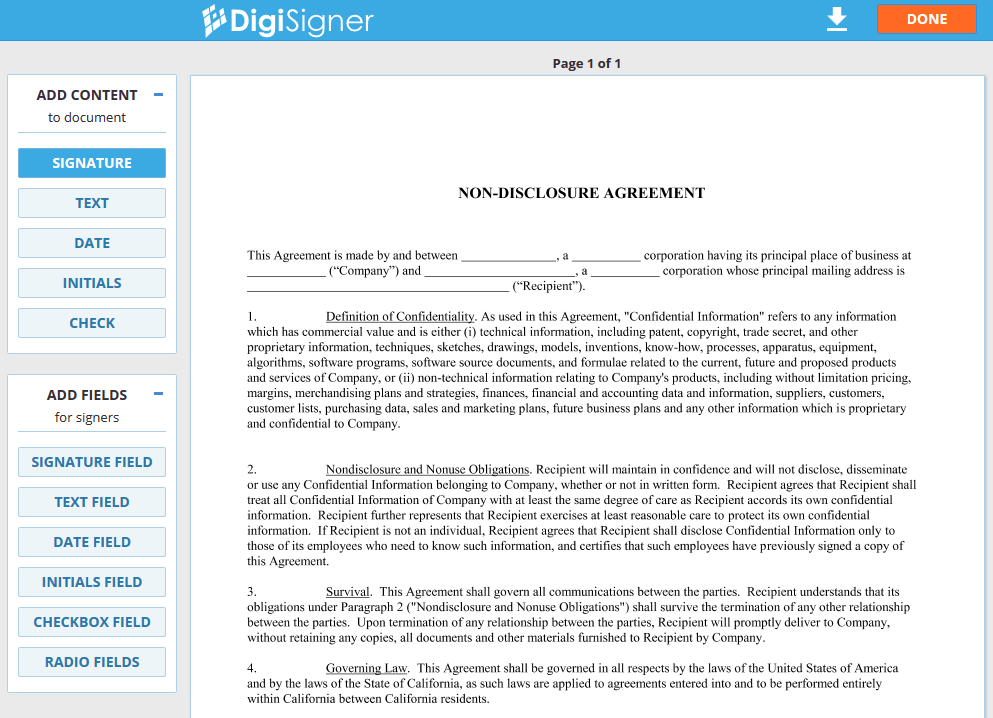
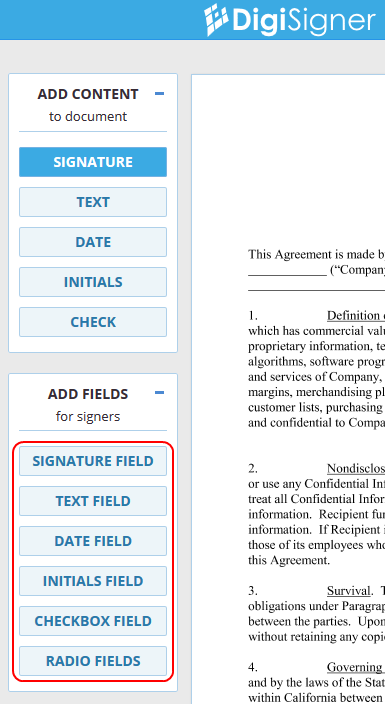
Now let’s add fields to your document. There are different kinds of fields you can add: signature fields, text fields, date fields, initials fields, checkbox fields and radio button fields.
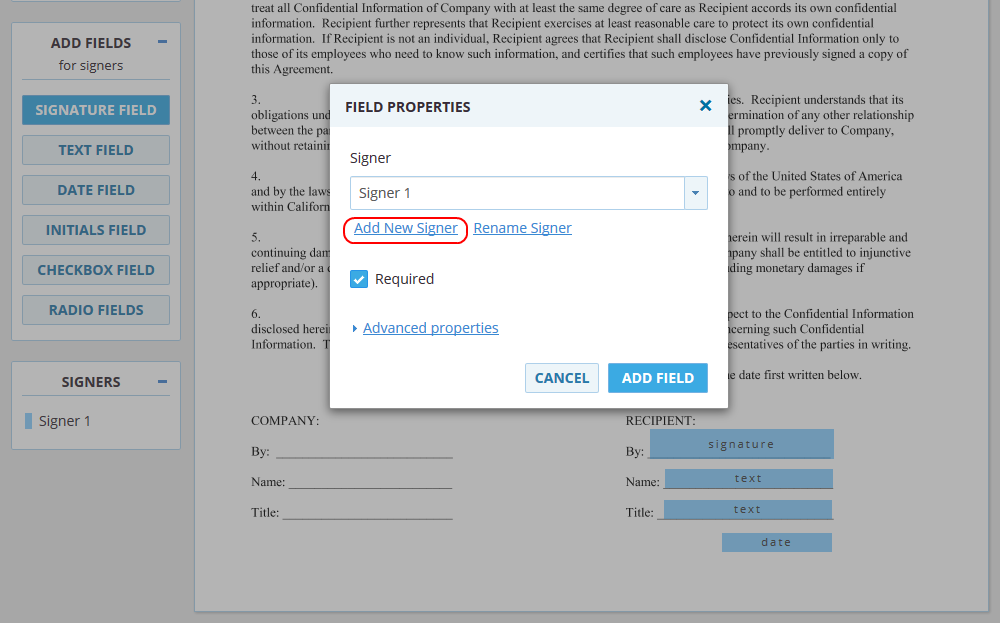
To add a signature field, click on the ‘SIGNATURE FIELD’ button. Then click in the document where you would like to place the field. The field properties dialog box will pop up.
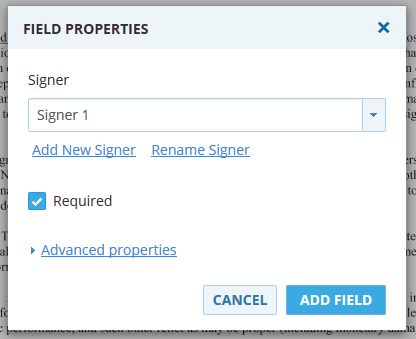
In this dialog box you can change your field’s settings, add a new signer, or rename an existing signer. Click on ‘ADD FIELD’ when you are finished. A new signature field will then appear in your document.
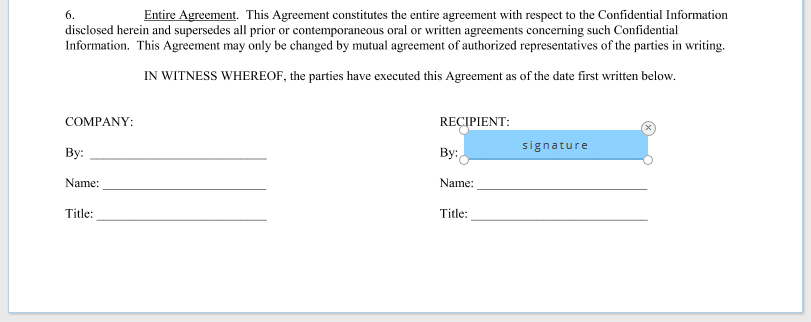
You can resize the field and position it wherever you like. If you click on the field, the field properties dialog box will pop up again allowing you to update the field’s settings. You can also add other types of fields to your document by selecting them in the ‘ADD FIELDS’ block.
If you are going to send your document to multiple signers and a particular field should be filled in by another person, click on the ‘Add New Signer’ link to create another signer. The field will be then assigned to the new signer (you can always reassign later).
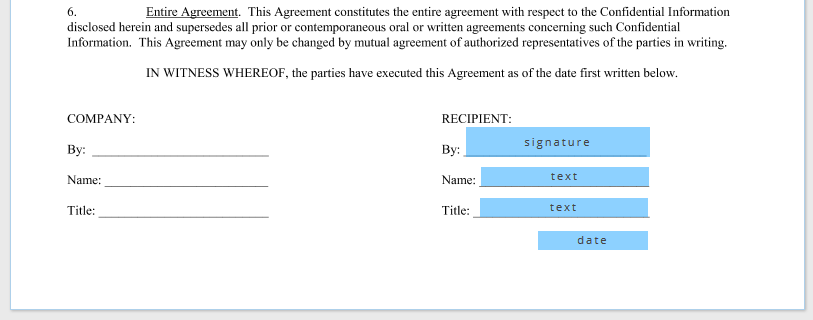
Here we added fields also for another signer.

When you are finished adding fields, just click on the ‘DONE’ button to save the changes. You will be then redirected to your list of documents. You can always open the document again to change the position or size of your fields or to add new fields.
Send Document for Signing
To send the document for signing, click on the ‘SEND FOR SIGNING’ button. The dialog for sending the document out will pop up. Enter the signers’ email addresses.
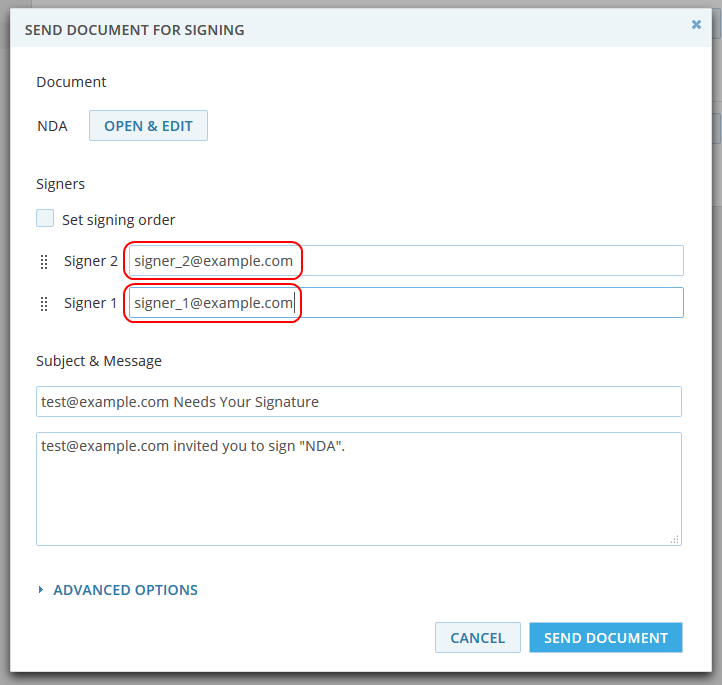
By default the document will be sent to all signers at once. But if you specify a signing order, the document will be first sent to the first signer, and only after this person will have it signed, it will be sent to the second signer and so on.
In the dialog, you can also specify your own subject and email text.
Click on the ‘SEND DOCUMENT’ button. The emails with the link to your document will be immediately sent to both signers. The signers’ email addresses will be displayed next to the document image.

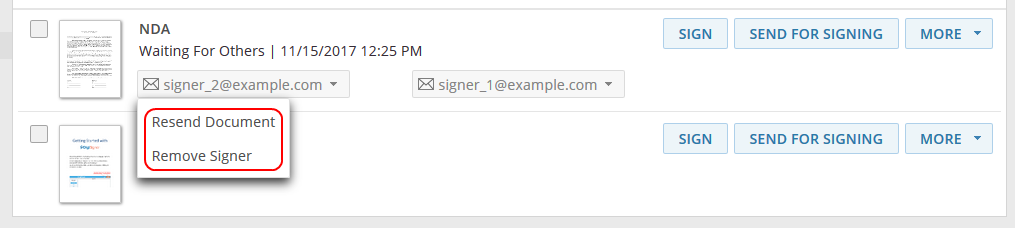
You can always resend the document or remove a signer by clicking on the signer’s email address and choosing the corresponding action.
Signers to Sign Your Document
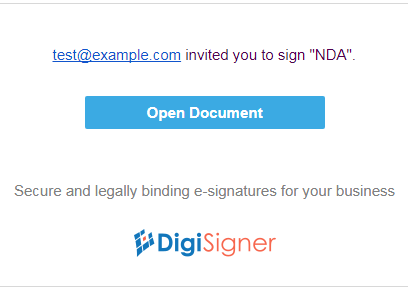
The signer will receive an email like the one in the screenshot. Please note the ‘Open Document’ button, which is automatically appended to the email.
After the signer clicks on the button, the document opens automatically in the browser.
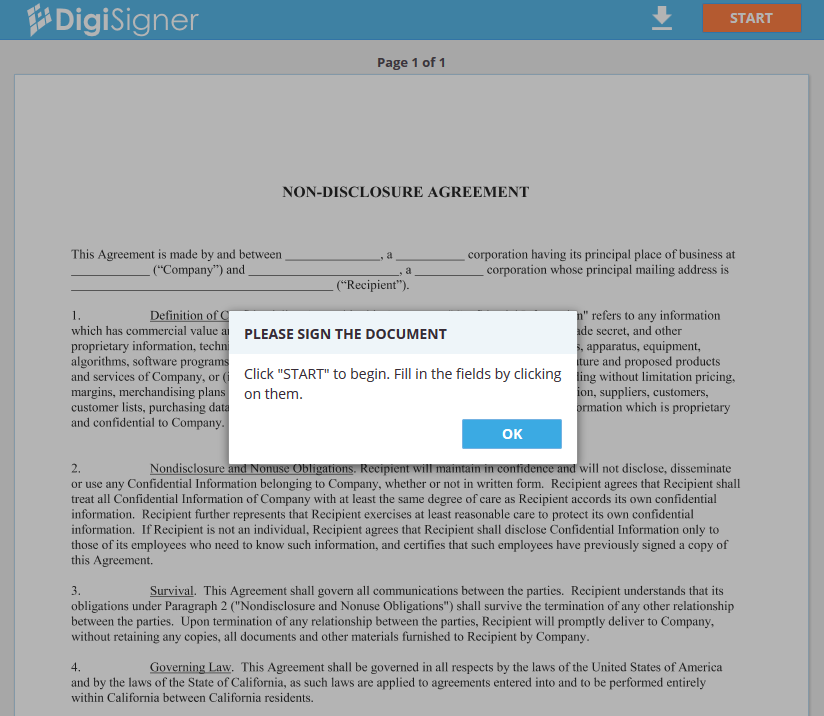
Before getting to the document, the signer will see a dialog box explaining how to proceed. After closing the dialog and clicking on ‘START’ at the top right corner, the signer will be automatically forwarded to the first field to be filled in. In our case it is a signature field. The field will blink to attract the signer’s attention.

Please note that the date field is automatically filled in with the current date.
To sign the document, the signer clicks on the signature field and creates a signature in the automatically opened signature dialog box. To enter text in the text field, the user just has to click on it and then start typing. Text fields are expandable, so in case the signer needs more place for typing the field will expand automatically.

After filling out the document, the signer clicks the ‘DONE’ button to save the document and complete the process.
You will immediately receive a confirmation email sent to your email address that says your document was signed. You will also receive a separate email with the completed document when all signers will sign the document. This email will be also sent to all the signers.
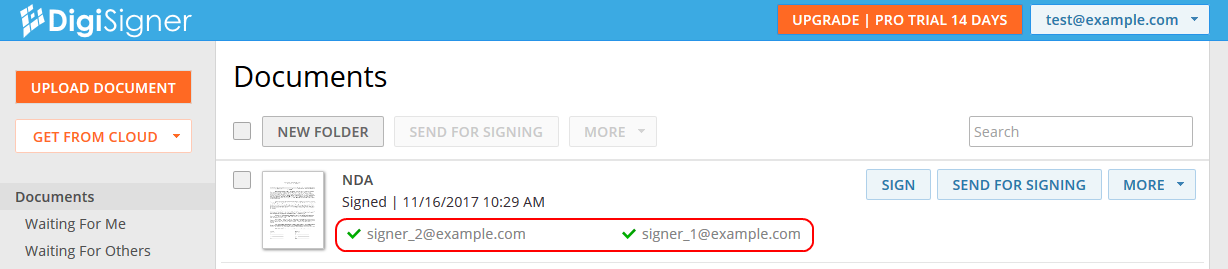
In your account, you will notice that the icon has changed to the green check mark, meaning that the document was successfully signed. The document status will also have changed to ‘Signed’.
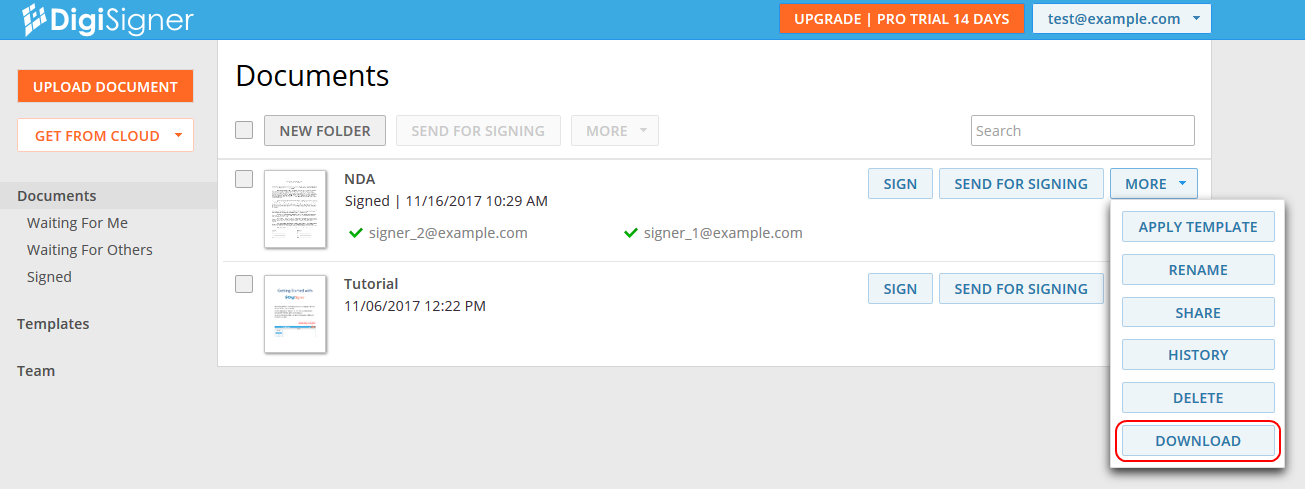
You can always download the completed document from your account using the download button.
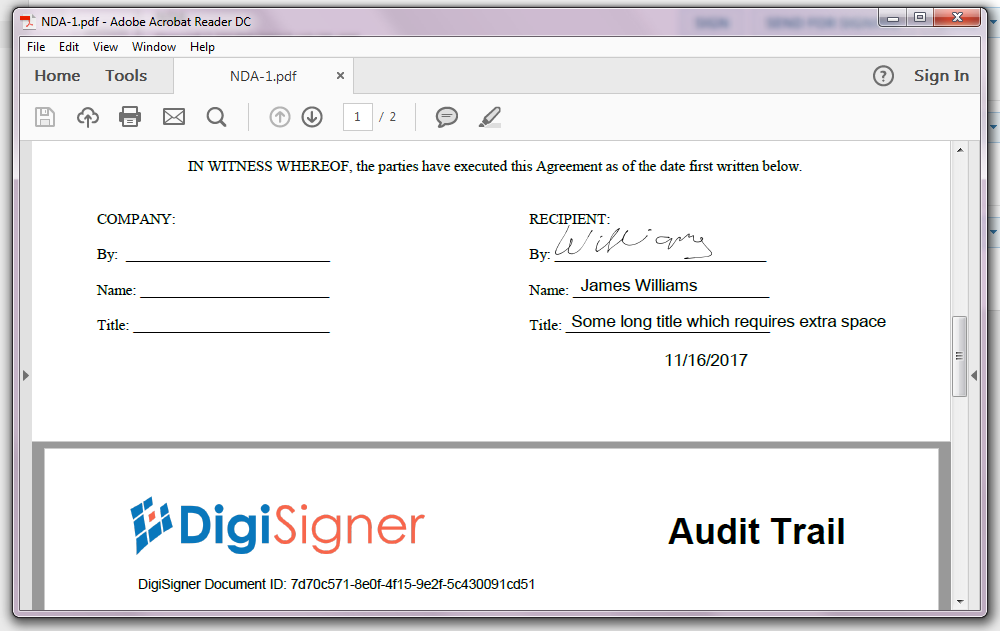
This is how the completed document looks.
We hope you liked our tutorial. If something is unclear or you have any suggestions, please don’t hesitate to contact us.